
Phase-2 of e-Invoicing
- Standard e-Invoices which is usually generated for Business to Business transactions, your customer’s National ID and full address details is mandatory.
- To create an E-invoice, the Customer’s Address, Billing Address, Item Name and Customer Name should be in Arabic.
Connect to Fatoora Portal
To push your invoices to the Fatoora portal from Zoho Billing, you’ll have to integrate your organization with the Fatoora portal. You need to generate a CSID in Zoho Billing using an OTP which is generated from the Fatoora portal. Here’s how:
Generate OTP in the Fatoora Portal
You have to generate OTP in the Fatoora portal first to generate CSID in Zoho Billing. To generate OTP in the Fatoora Portal:
- Log in to the Fatoora portal.
- Click Onboard New Solution Unit/Device.
- Enter the number of devices for which you want to generate OTP. If you’re using only Zoho Billing, enter 1.
- Your OTP will be generated in the portal and you can copy or export it as a file.
The OTP generated from the Fatoora portal will be valid only for one hour. You have to enter the OTP in Zoho Billing within one hour. Once the CSID is generated, you’ll be able to push your invoices from Zoho Billing to the Fatoora portal. To do this:
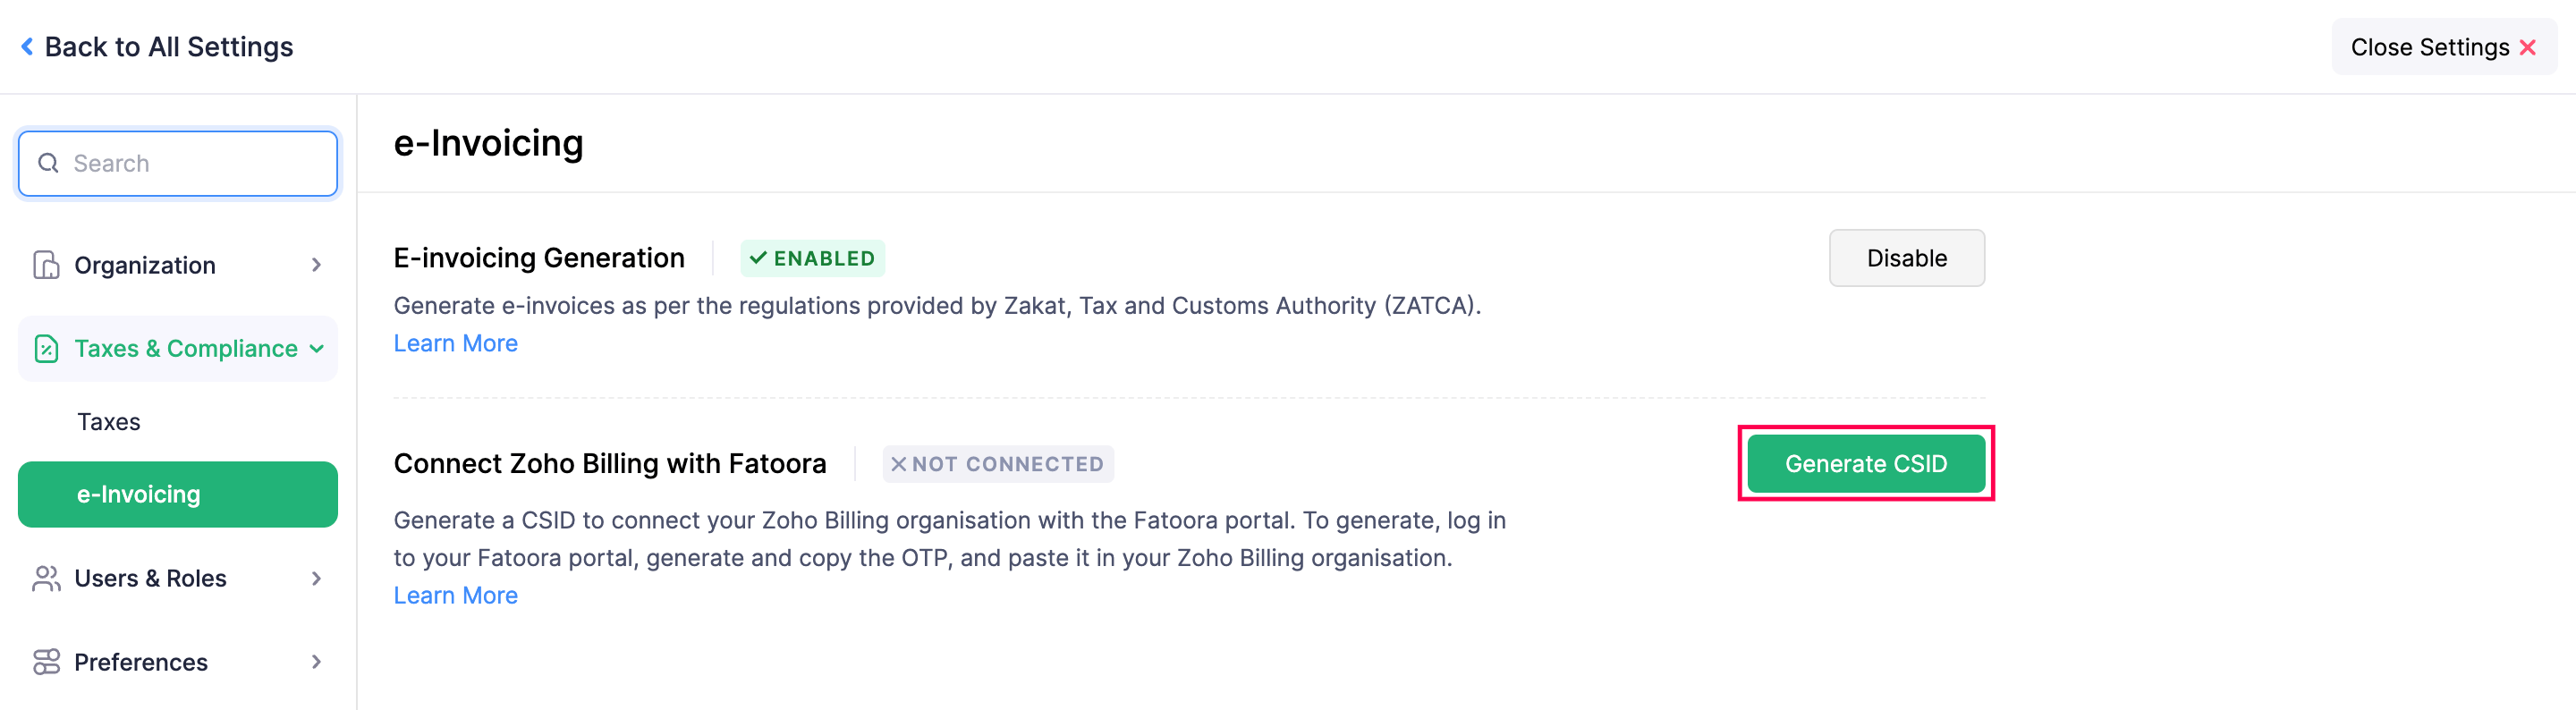
Go to Settings from the top right corner.
Select e-Invoicing under Taxes & Compliance.
Click Generate CSID.
Enter the OTP and click Generate CSID.
To check your organisation’s integration with the Fatoora portal, you can go to Fatoora portal and click View List Of Solutions and Devices.
Disconnect from Fatoora Portal
If the CSID was revoked in the Fatoora portal, you’ll not be able to push invoices to the Fatoora portal from Zoho Billing. You’ll have to disconnect it in Zoho Billing as well. Here’s how:
- Go to Settings from the top right corner.
- Select e-Invoicing under Taxes & Compliance.
- Click Disconnect.
- Click Disconnect in the following pop-up.
The connection will be removed. If you want to reconnect again in the future, you have to generate the CSID again.
Configure User Permissions
You can configure the users in your Zoho Billing organization to whom you would want to give access to the e-Invoicing module and push transactions to the Fatoora portal. Here’s how:
- Go to Settings from the top right corner.
- Select Roles under Users and Roles.
- Click New Role in the top right corner if you want to provide permission for a new role or click Edit next to the role which you want to edit.
- Scroll down to the e-Invoicing section and mark Push Transactions.
- Click Save.
Functions in e-Invoicing
Statuses of e-Invoices
Here are the different statuses related to Invoices, Credit Notes and Debit Notes in Zoho Billing.
| Status | Description |
|---|---|
| Yet-to-be Pushed | The transaction is not yet pushed to the Fatoora portal. |
| Push Initiated | The push has been initiated to the Fatoora portal. |
| Pushed | The transaction has been pushed to the Fatoora portal successfully. |
| Failed | The transaction has not been pushed to the Fatoora portal. |
Mandatory Fields for an e-Invoice
When creating an invoice, there are some mandatory fields set by the ZATCA which is required for an e-Invoice. Here’s the list of mandatory fields required to create an e-Invoice:
| Module | Mandatory Fields |
|---|---|
| Organization’s details |
|
| Customer’s details |
|
| Invoice Creation |
|
| Item details | Item Name |
Push your Invoices to Fatoora portal
In Zoho Billing, invoices can be pushed to the Fatoora portal easily. The process depends upon whether you’ve enabled Transaction Approval or not. If you have enabled transaction approval, the invoice will go through an approval process.
Standard invoices should be pushed to Fatoora portal before sending it to the customer. Whereas, Simplified Tax Invoice, should be pushed to Fatoora portal within 24 hours from sending it to the customer as per ZATCA’s e-Invoicing Regulations.
Once you’ve created an invoice, you can push them to the Fatoora portal. Here’s how:
- Go to Invoices under Sales on the left sidebar.
- Select the invoice that you want to push to the Fatoora portal.
- Click Push to Fatoora.
If the push fails, you can retry after resolving the errors.
Quote Preferences
If you’ve enabled quote preferences to send invoices when a quote gets approved, the invoices will be pushed to Fatoora portal automatically according to the preference you’ve set.
If your preference is:
- Create Invoice as draft: The invoice created will be in draft status and you’ll have to push it manually using the Push to Fatoora button.
- Create, Push and Send: The invoice created will be pushed to the Fatoora portal. If it is pushed successfully, it will be sent to the customer or if failed the reason for failure will be shown.
You can also refer to the help document provided by ZATCA regarding e-Invoicing.
 Yes
No
Yes
No
Thank you for your feedback!