
Android Integration
Zoho Payments provides a native Android SDK that lets you securely collect payments within your Android app.
Note: The minimum SDK support for the ZohoPayments SDK is Android 8.
Insight: If you’d like to test your widget integration and payment flows, you can use the Zoho Payments Sandbox environment. Refer to the Sandbox help doc for more details. To enable, Zoho Payments sandbox contact support.
Here’s the end-to-end android integration flow:
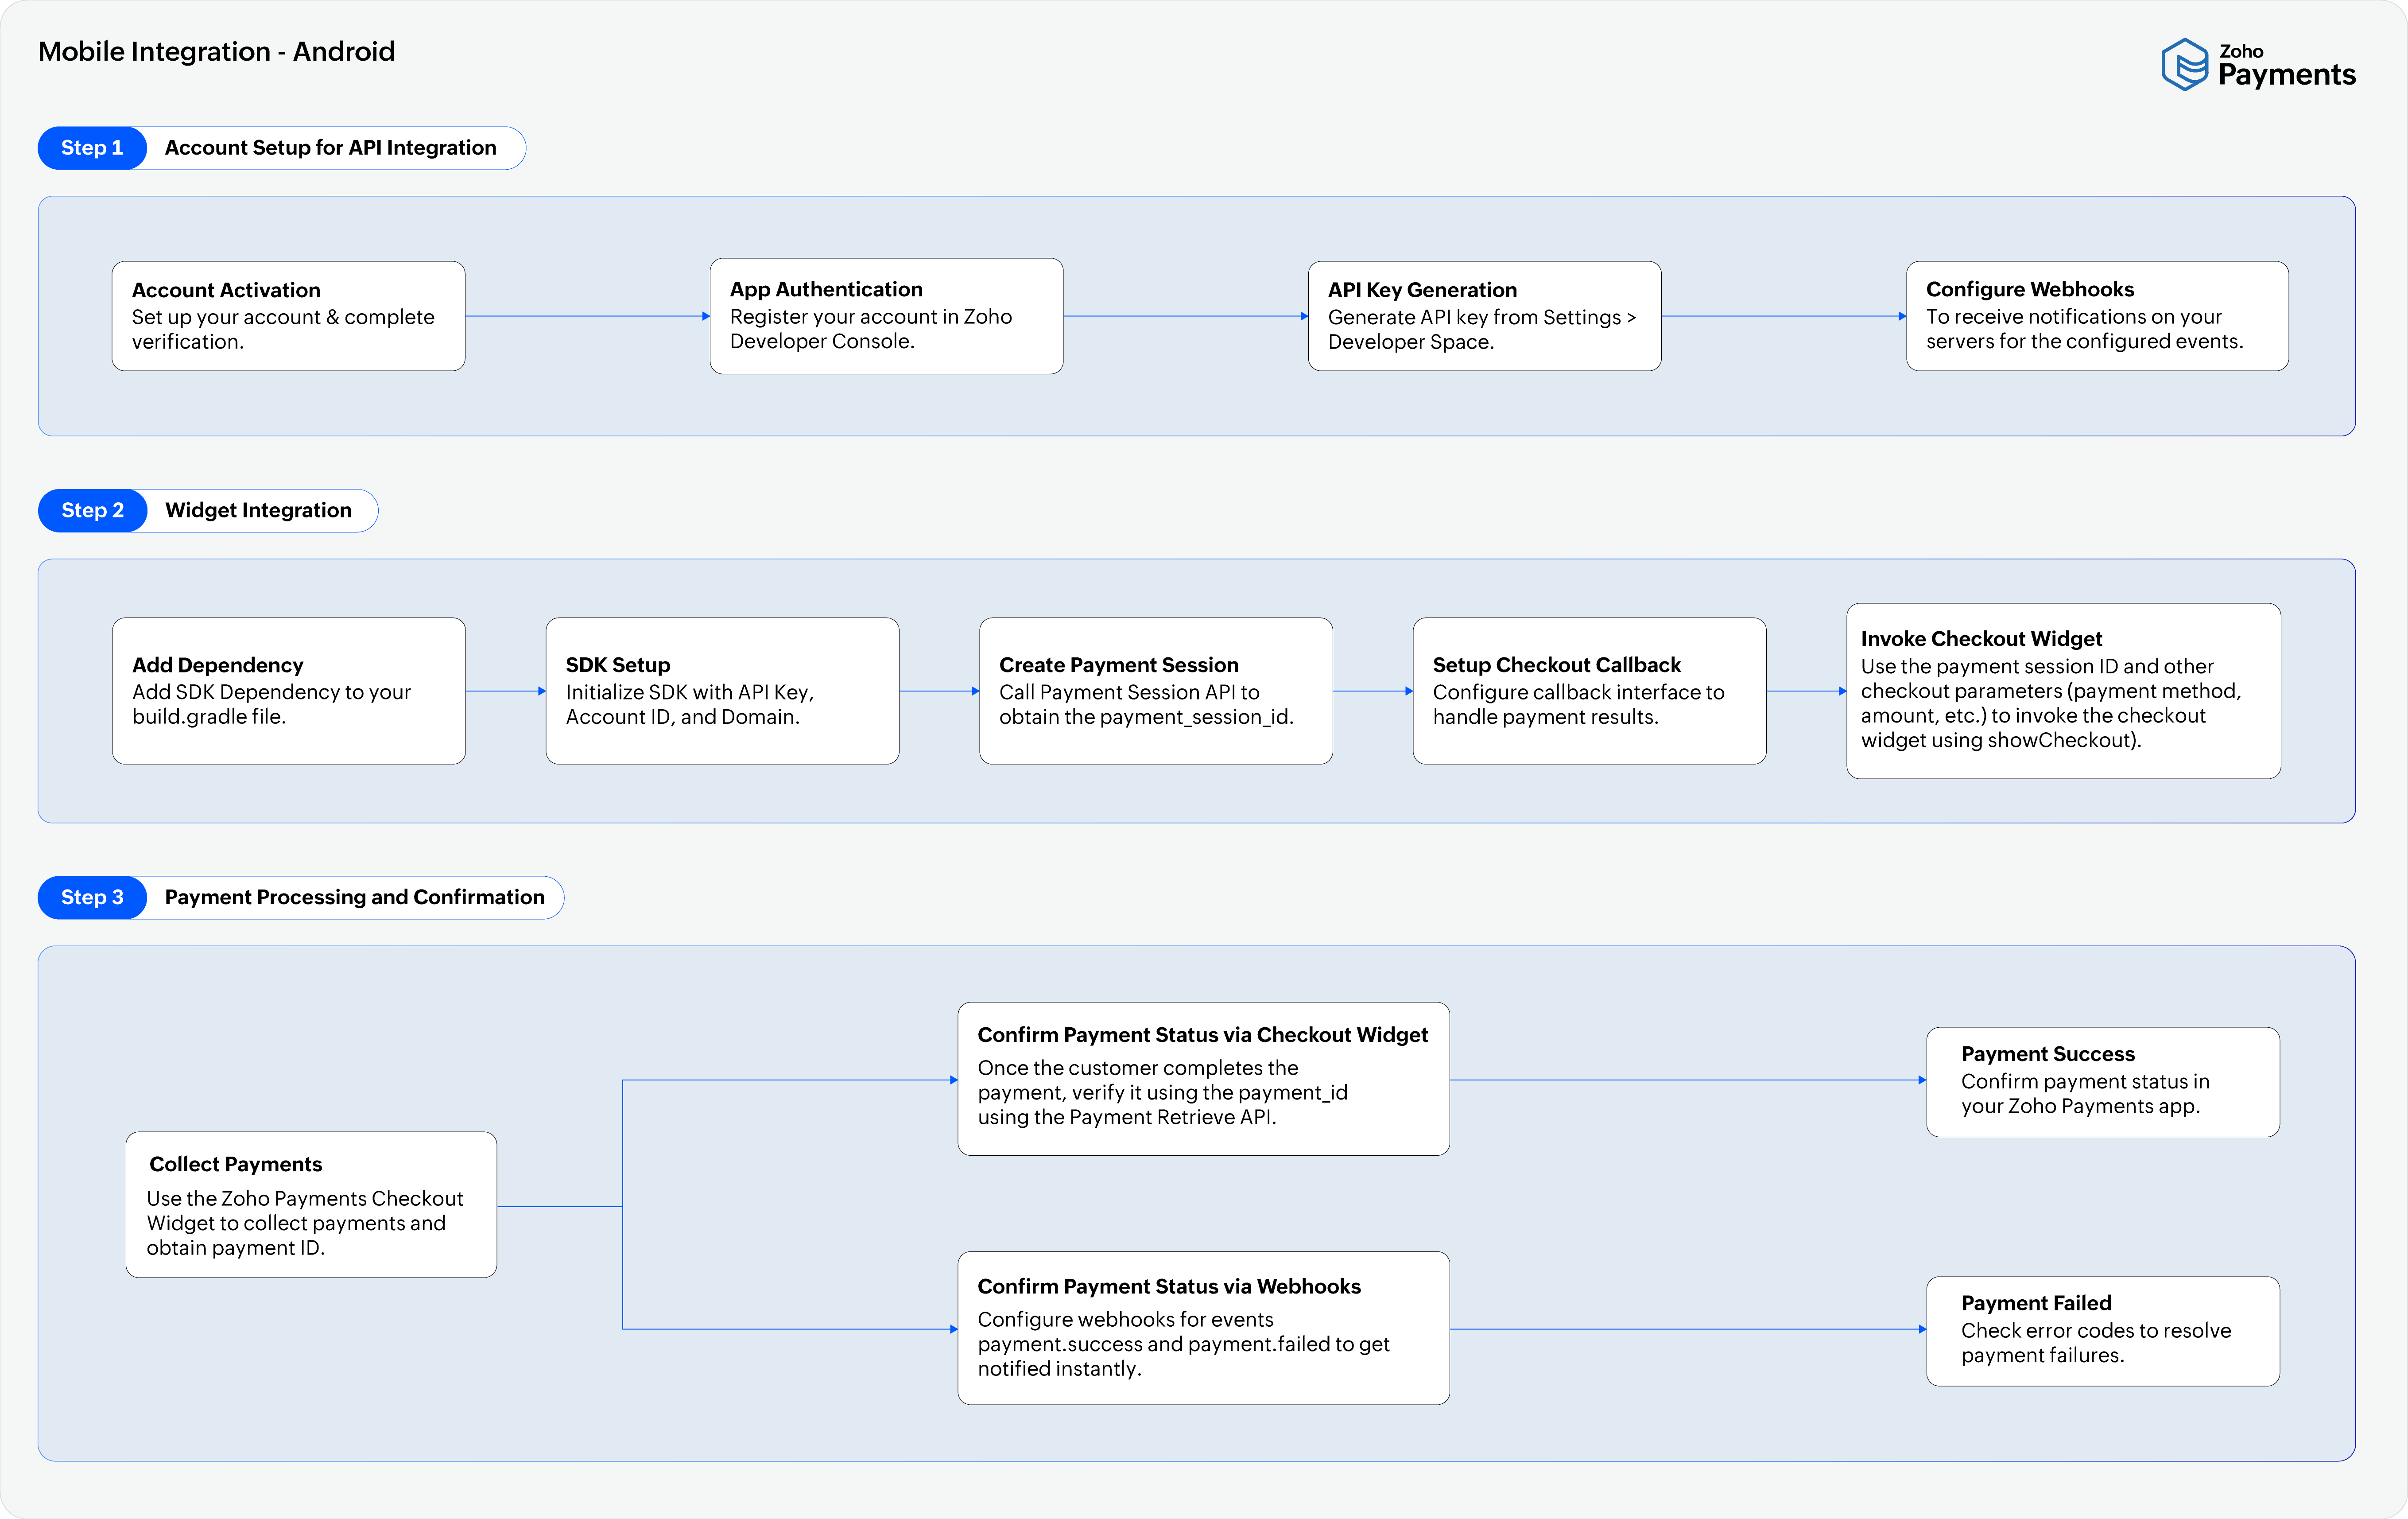
1. Install Zoho Payments SDK
First, you’ll need to add the Zoho Payments SDK to your Android app to initiate the integration.
To install the SDK in your Android app:
- Add the Zoho Payments dependency (latest SDK version 1.0.2) to your app’s
build-gradlefiles at both the project and app levels, as shown below:
allprojects {
    repositories {
        maven { url 'https://maven.zohodl.com' }
    }
}
dependencies {
    val payments_version = "1.0.2"

    implementation("com.zoho.paymentsdk:paymentsdk:$payments_version")
}
- Initialize Zoho Payments SDK using your API Key and Account ID.
CheckoutSDK.initialize(
            apiKey = "",//api key of org
            accountId = "", //account id of organization
        )
Once the SDK is initialized, you can create the payment session.
2. Create Payment Session
To initiate the payment process, you need to create a payment session. Based on your payment type, you can create the session for one-time or recurring payments.
Payment Session for One-time Payments
To invoke the checkout widget, you need to obtain the paymentSessionId. To do this:
- Collect payment information from the website (amount, currency, etc.).
- Call the Payment Session Create API.
The API will return a paymentSessionId. Use this ID to invoke the checkout widget and initiate the payment process.
Create Customer
Collect customer details (name, email, phone, and metadata) and call the Create Customer API. The API will return a customer_id, which you can use to initiate a payment session for mandate enrollment.
Create Payment Session for Mandate Enrollment
Call the Create Payment Session for Mandate Enrollment API on your server using an OAuth token to obtain a payment_session_id.
Note: Each session allows up to three payment attempts, but only one can succeed. Any additional attempts return an invalid_payment_session response.
Use the payment_session_id when invoking the checkout widget.
3. Set Up Payment Callbacks
Set up the ZohoPaymentsCheckoutCallback interface to receive payment results.
interface ZohoPayCheckoutCallback {
    fun onPaymentSuccess(paymentSuccessObject: PaymentSuccessObject)
    fun onPaymentFailure(paymentFailureObject: PaymentFailureObject)
}
4. Invoke Checkout Widget
Invoke the checkout widget from your app to initiate the payment process. Use the CheckoutOptions with your paymentSessionId and other parameters such as name, invoice number, and payment method.
Specify the domain as IN for businesses registered in India.
enum class ZohoPayDomain {
    IN

}
The payment parameters for CheckoutOptions and the supported payment methods are listed below:
| Parameter | Description |
|---|---|
paymentSessionId |
A unique identifier created for each payment session. Learn how to create a payment session. |
description |
Description of the payment session. The maximum length of the description can be 500 characters. |
invoice_number |
Invoice number of the payment session. The maximum length of the invoice number can be 50 characters. |
reference_number |
Reference number for the payment. |
name |
Name of the customer. |
email |
Email address of the customer. |
phone |
Phone number associated with the customer. |
payment_method |
Type of payment method (e.g., Cards, Net Banking, or UPI). |
Choose your preferred payment method from the below listed enums to receive payments from customers.
enum class PaymentMethod(val rawValue: String) : Parcelable {
    CARD,
    NET_BANKING,
    UPI
}
val options = CheckoutOptions(paymentSessionId = "1234567890", description = "description of this payment",invoiceNumber = "Inv_01" ,referenceNumber = "Ref_01",name = "Patricia Boyle" ,email = "pboyle@zylker.com",phone = "9898xxxxxx" ,paymentMethod = PaymentMethod.CARD)
You can invoke the checkout widget using the following function. Use the sandbox environment for testing, and switch to production when you’re ready to go live.
Insight:
When using sandbox, set ZohoPaymentsEnvironment to .sandbox. Refer to the Sandbox Android developer doc for more details.
enum class ZohoPaymentsEnvironment
{
    live,
    sandbox
}
CheckoutSDK.showCheckout(this, options, ZohoPayDomain.IN, environment = ZohoPaymentsEnvironment.sandbox, object : ZohoPayCheckoutCallback{
    override fun onPaymentSuccess(paymentSuccessObject: PaymentSuccessObject) {
        //Handle Success case
        // val paymentId = paymentSuccessObject.paymentId
        // val signature = paymentSuccessObject.signature
    }

    override fun onPaymentFailure(paymentFailureObject: PaymentFailureObject) {
        //Handle Failure case
    }
})
If you’re facing any errors while processing payments via mobile app, refer to the error messages to identify and resolve the issue.
5. Confirm the Payment
Once the customer completes the payment, the SDK will return a paymentId and signature. You can confirm the payment on your server and update your system.
Note: In some cases, you may not receive the paymentId if the customer accidentally closes the widget before a response is returned. In such cases, use your configured webhooks or the paymentSessionId to retrieve the payment status.
6. Verify Payment Status
You can verify your payment status in three ways:
-
Verify via Widget Response: After receiving the
paymentId, verify the payment status using the Payment Retrieve API. For recurring payments, use the Retrieve Mandate API to check specific mandates. Based on the status returned (success, failure, or pending), update your system. -
Verify via Webhooks: Use your configured webhooks for the events payment.success and payment.failed to receive the final payment status directly.
-
Verify via Session ID: If you haven’t received the payment status via the widget response or webhooks, use the Payment Session Retrieve API to verify the payment result.
Note: Ensure that all three options are configured for reliable payment verification.
 Walkthrough of Zoho Payments personalized to your business needs