Invoices
An Invoice is a financial document that indicates the supply of goods or services between a vendor and a customer with the payment information that the customer has to make.
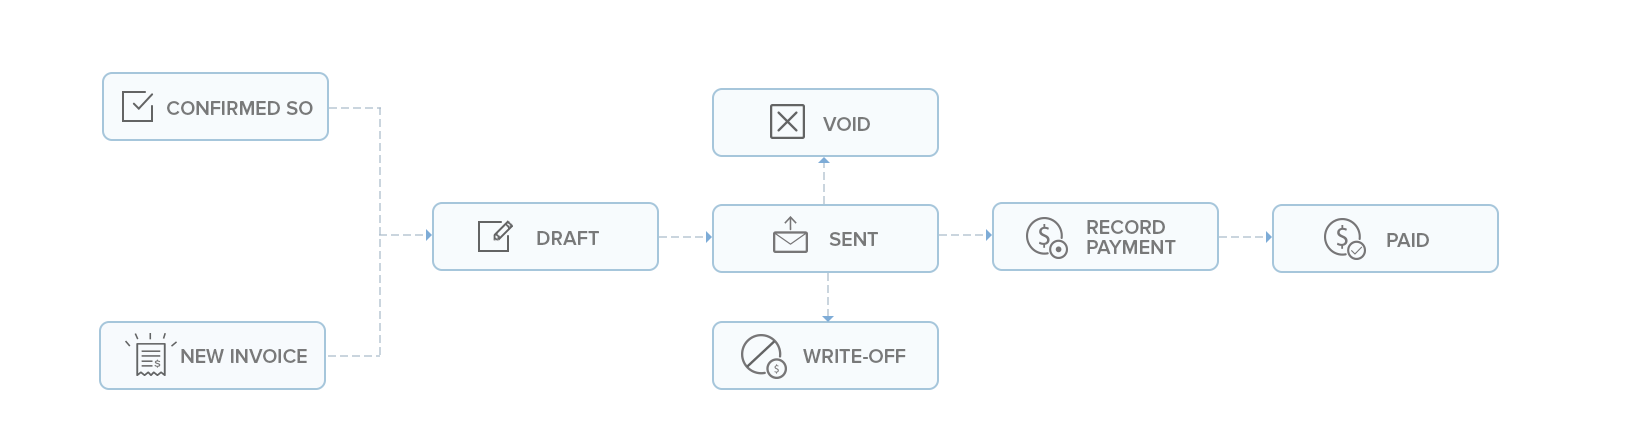
Invoice Statuses
| Status | Description |
|---|---|
| Draft | Invoices when created will be in Draft status before being sent to the customer. |
| Sent | Invoices once sent to the customer with a due date for payment, will be shown as Sent. |
| Overdue | Once the due date for payment is exceeded, it will be indicated as Overdue. |
| Partially Paid | When the payment is made for a part of the items in the invoice, it will be shown as Partially Paid. |
| Paid | When the invoice amount is fully paid by your customer, it will be shown as Paid. |
| Void | The status of an invoice becomes Void when you have chosen to void it. This comes in handy when you want to freeze an invoice and create another one in its place. |
Creating an Invoice
To create an invoice:
- Log in to your Zoho Inventory organization.
- Go to Sales on the left sidebar, and select Invoices.
- Click + New in the top right corner.
- In the New Invoice page, fill in the following fields:
- Customer Name: Select the customer for the invoice.
- Invoice#: The default transaction series will be used. Choose a different one from the dropdown, if needed. Click the Settings icon in the right of the field to enable or disable the option to auto-generate invoice numbers.
- Order Number: Enter the order number if necessary.
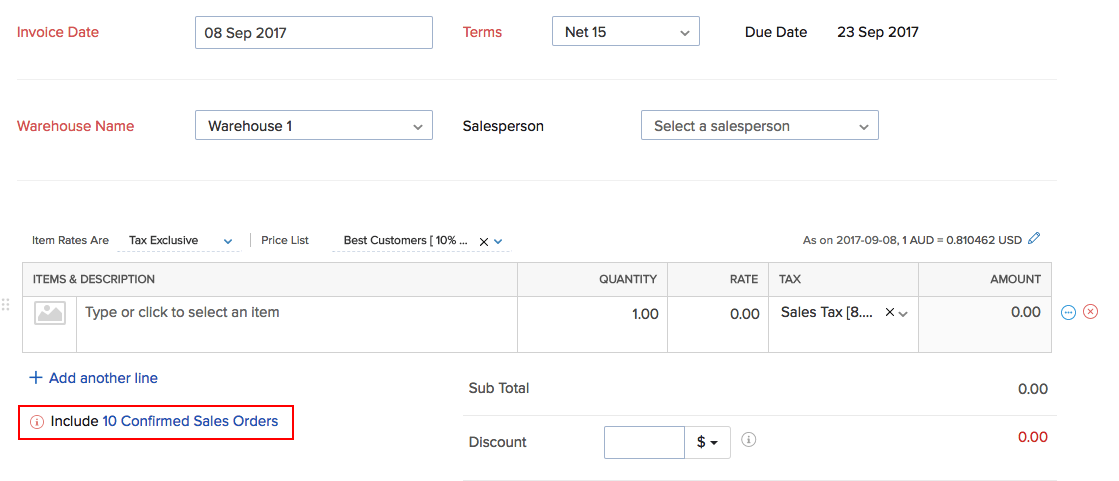
- Invoice Date: Choose the date for creating the invoice.
- Terms: Choose the payment terms for which the invoice is due.
- Due Date: Pick the payment due date.
- Salesperson: Select the salesperson responsible for this invoice, if applicable.
- Select Price List: Choose the price list for the items in the invoice.
- Item Table: Select and add items to the table. Then, fill in the following columns: * HS Code: If you had entered the HS Code when you created the item, this field will be auto-populated when you select an item in the Item Table. If the code wasn’t configured during item creation, click the Edit icon next to this field and enter it. * Tax Category: This field is auto-filled based on the tax category selected when you created the item. * Quantity: Enter the quantity for each item. * Rate: The rate will be auto-filled based on the item’s rate you set. Modify it if needed. Click Apply Price List under this field to select a price list for the item. * Tax Column: This field is auto-filled based on the customer’s address, the item’s tax category, and the customer’s country. * Apply Withholding Tax Column: Check this for each item that is applicable for withholding tax.
Note: Ensure Withholding Tax is enabled for your organization and the customer.
Recent Transactions: Click this to view all the recent transactions for the item in the right pane. You can also hover over the item price and click it to copy.
- Discount: Enter a Percentage (%) or Amount for discounts.
- Bulk Actions: Click this option to perform bulk actions in the Item Table. Select Bulk Update Line Items from the dropdown to update the Project or Account of each item in the table or select Show Additional Information to show the project and account for each line item in the table.
- Click + Add New Row to add additional rows for items.
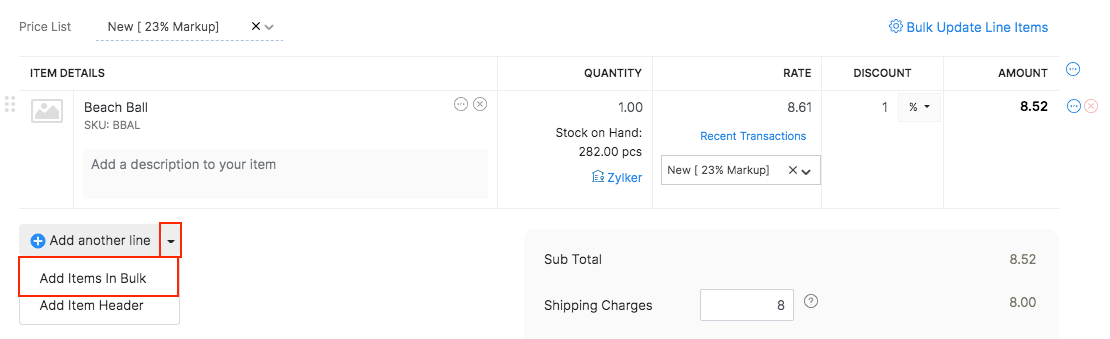
- Click Add Items in Bulk to add multiple items at once.
- Shipping Charges: Add shipping costs for your items. Click Apply Tax on Shipping Charge to select a tax on shipping.
- Adjustment: Enter adjustments if needed. Use a Negative (-) sign to reduce the amount.
- Customer Notes: Add notes to display them in the invoice.
- Terms and Conditions: Add your business terms and conditions for the invoice.
- Attach File(s) to Invoice: Click Upload File to attach a file to the invoice.
- I have received the payment: Check this if you’ve received the payment when you’re creating this invoice. Then, select the Payment Method and Deposit Account from the table below. If the customer used multiple payment methods, click + Add Split Payment to split the payment. The invoice will be saved as Paid.
Click Save as Draft to save the invoice as a draft, or Save and Send to send it to the customer.
You can also schedule an invoice during the creation process. Here’s how:
- Click the dropdown next to the Save and Send and select Save and Send Later.
- In the Schedule Mail page, select the schedule date under When would you like to send the email?.
- Verify other details and click Schedule.
Now, if you haven’t recorded the payment directly, you can record it later for the created invoice once the customer pays the amount.
Pro Tip: To create an invoice directly from the Home page, click the Quick Create button in the top right corner and select Invoices from the dropdown.
Creating an Invoice From a Sales Order
To create an invoice from a sales order:
Go to the Sales Orders module under Sales from the left sidebar.
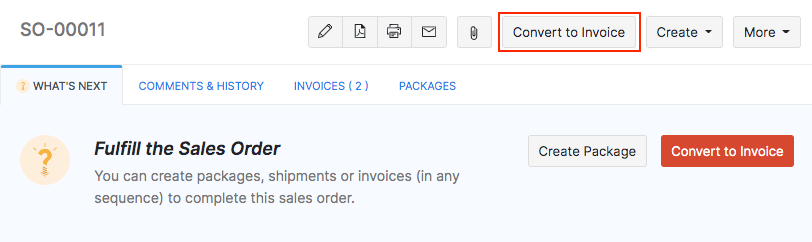
Open the sales order for which you want to create an invoice.
Click the Create dropdown and select the Invoice option. Or click the Convert to Invoice button.
A New Invoice page opens up with most of the fields pre-filled from the sales order. You can edit them, if required.
Note: The Customer Name field cannot be edited as the name on the invoice and sales order must be the same.
Enter the Terms & Conditions, charges and configure the payment method.
Save and send the invoice to your customer.
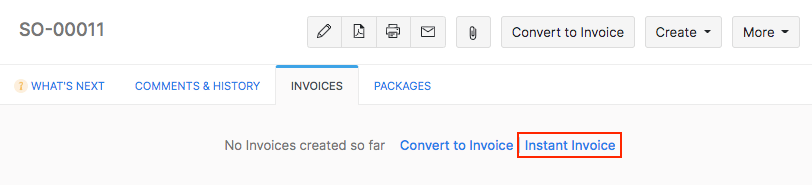
You can view the invoices created for a sales order under the Invoices tab in the corresponding sales order page.

Pro Tip: If you want to save time and quickly convert the sales order to an invoice, you can click the Instant Invoice option under the Invoice tab in the sales order page. This will skip the edit page and create an invoice instantly. As of now, you cannot create an instant invoice for serial/batch tracked orders.
Creating an Invoice for Multiple Sales Orders
If you have several sales orders that are not invoiced yet, you can create a single invoice for all orders. However, please note that the sales orders must be from the same customer and has to be in Confirmed status.
To create an invoice for multiple sales orders:
Go to the Invoices module and open the New Invoice page.
Select the customer to whom you wish to raise an invoice.
If there are existing sales orders with no associated invoices for that customer, then you can find the Include Confirmed Sales Orders option below the Item Details section.
Click on it and select the sales orders that you want to add to the invoice.
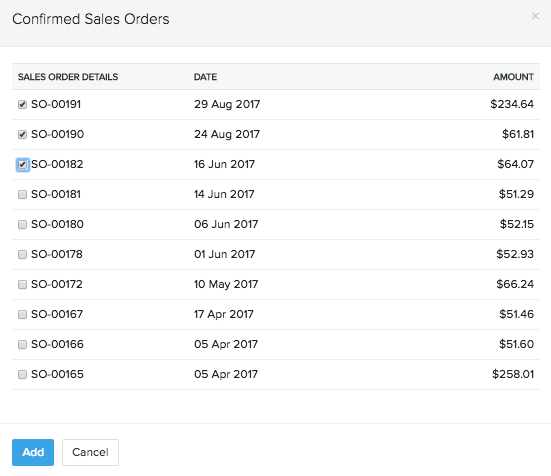
The items of the selected sales orders will be added to the invoice.
Fill up any additional details and then click Save to create a invoice for multiple sales orders.
Note:
- This option is only available while creating a direct invoice.
- Sales orders that are marked for drop-shipment/backorder or already have an invoice associated, cannot be included.
Add Items in Bulk
To add multiple items to your invoice at once:
Open a new invoice page.
Fill up the basic details and go to the item details section.
Click the dropdown button next to Add another line button and select the Add items in bulk option.
In the following pop-up, select the items you want to add.
Configure the quantity of the selected items.
If you want to generate multiple serial number at once:
- Click the Select Serial Numbers in the line item level under quantity.
- Click Generate Serial Number
- Serial Number: Set a starting serial number to define the first number in your desired sequence.
- Count: Determine how many serial numbers you want to generate.
Click Add Items to add the items to your invoice.

Importing Invoices
To import invoices into your Zoho Inventory account:
Navigate to the Invoices module under Sales from the left sidebar.
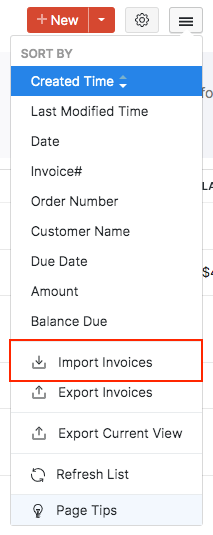
Click on the Menu icon in the top right corner and select Import Invoices option from the dropdown.
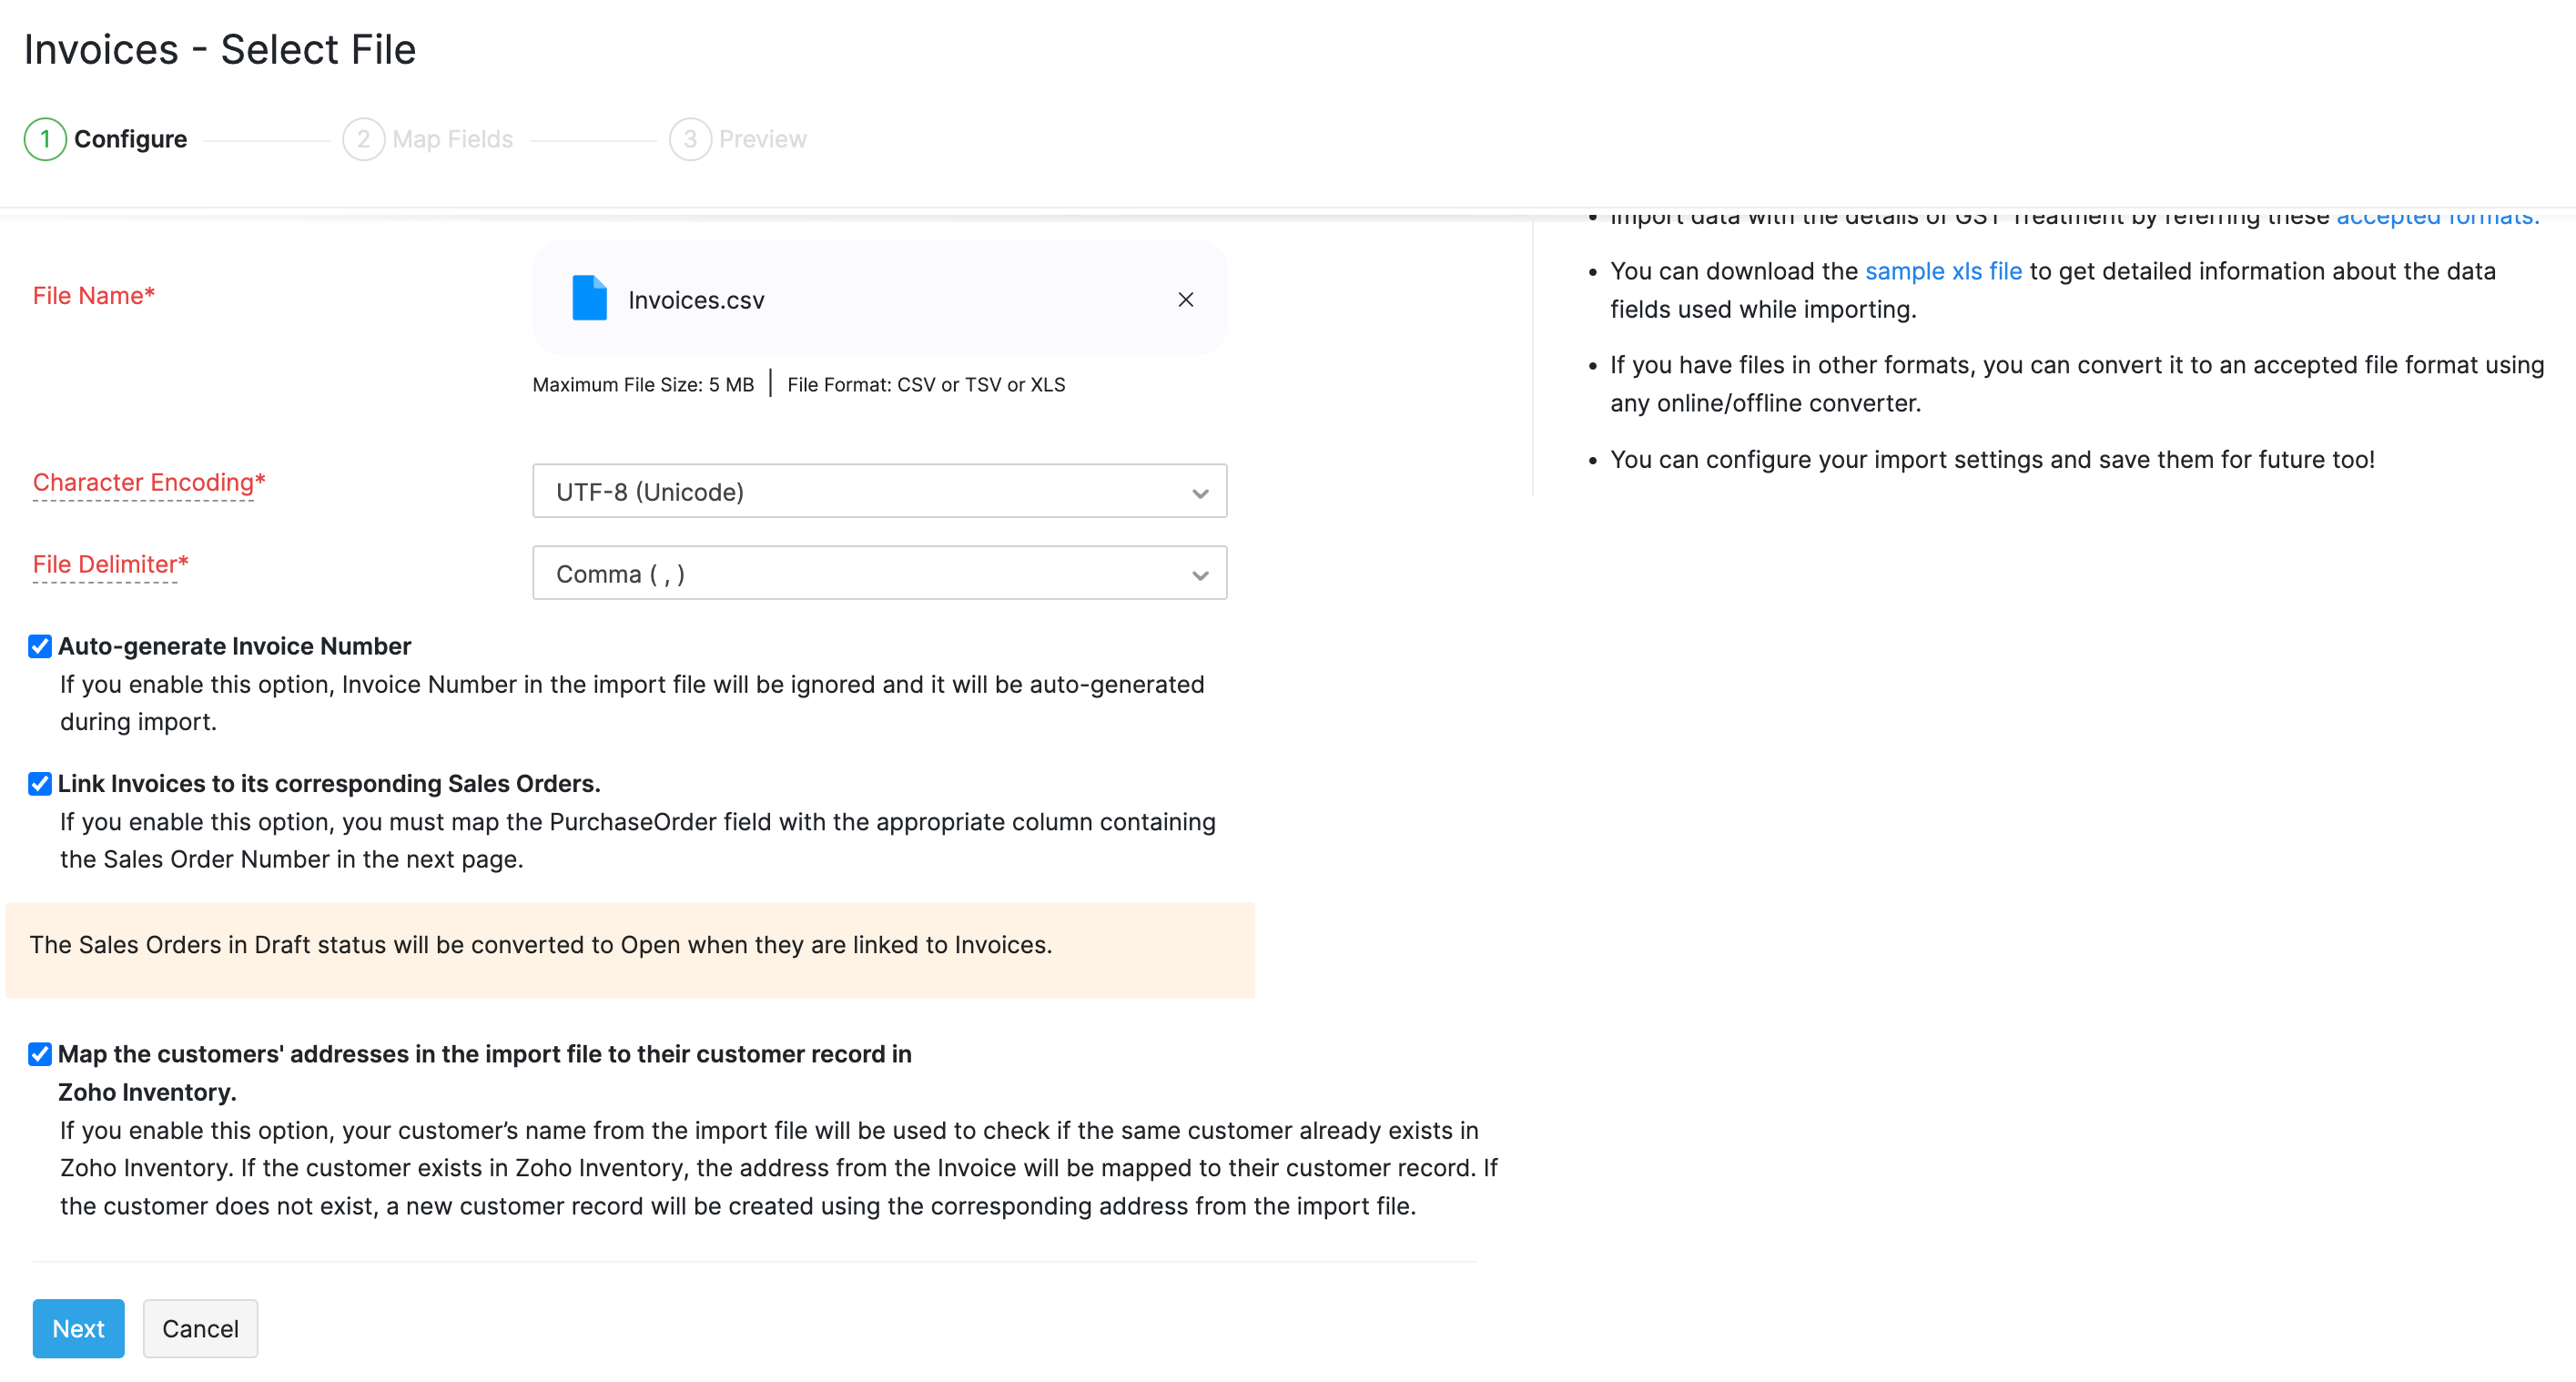
Upload the relevant .csv or .tsv type file from your device. You can download and refer the sample file from this page to prepare the data on your import file.
Choose the character encoding involved from the dropdown. By default, the character encoding is UTF-8(Unicode).
Choose the File Delimiter(comma or semicolon). By default it will be comma for a .csv type file.
To generate invoice numbers automatically, select the Auto-generate Invoice Number option.
To link invoices with existing sales orders select the Link Invoices to its corresponding Sales Orders option.
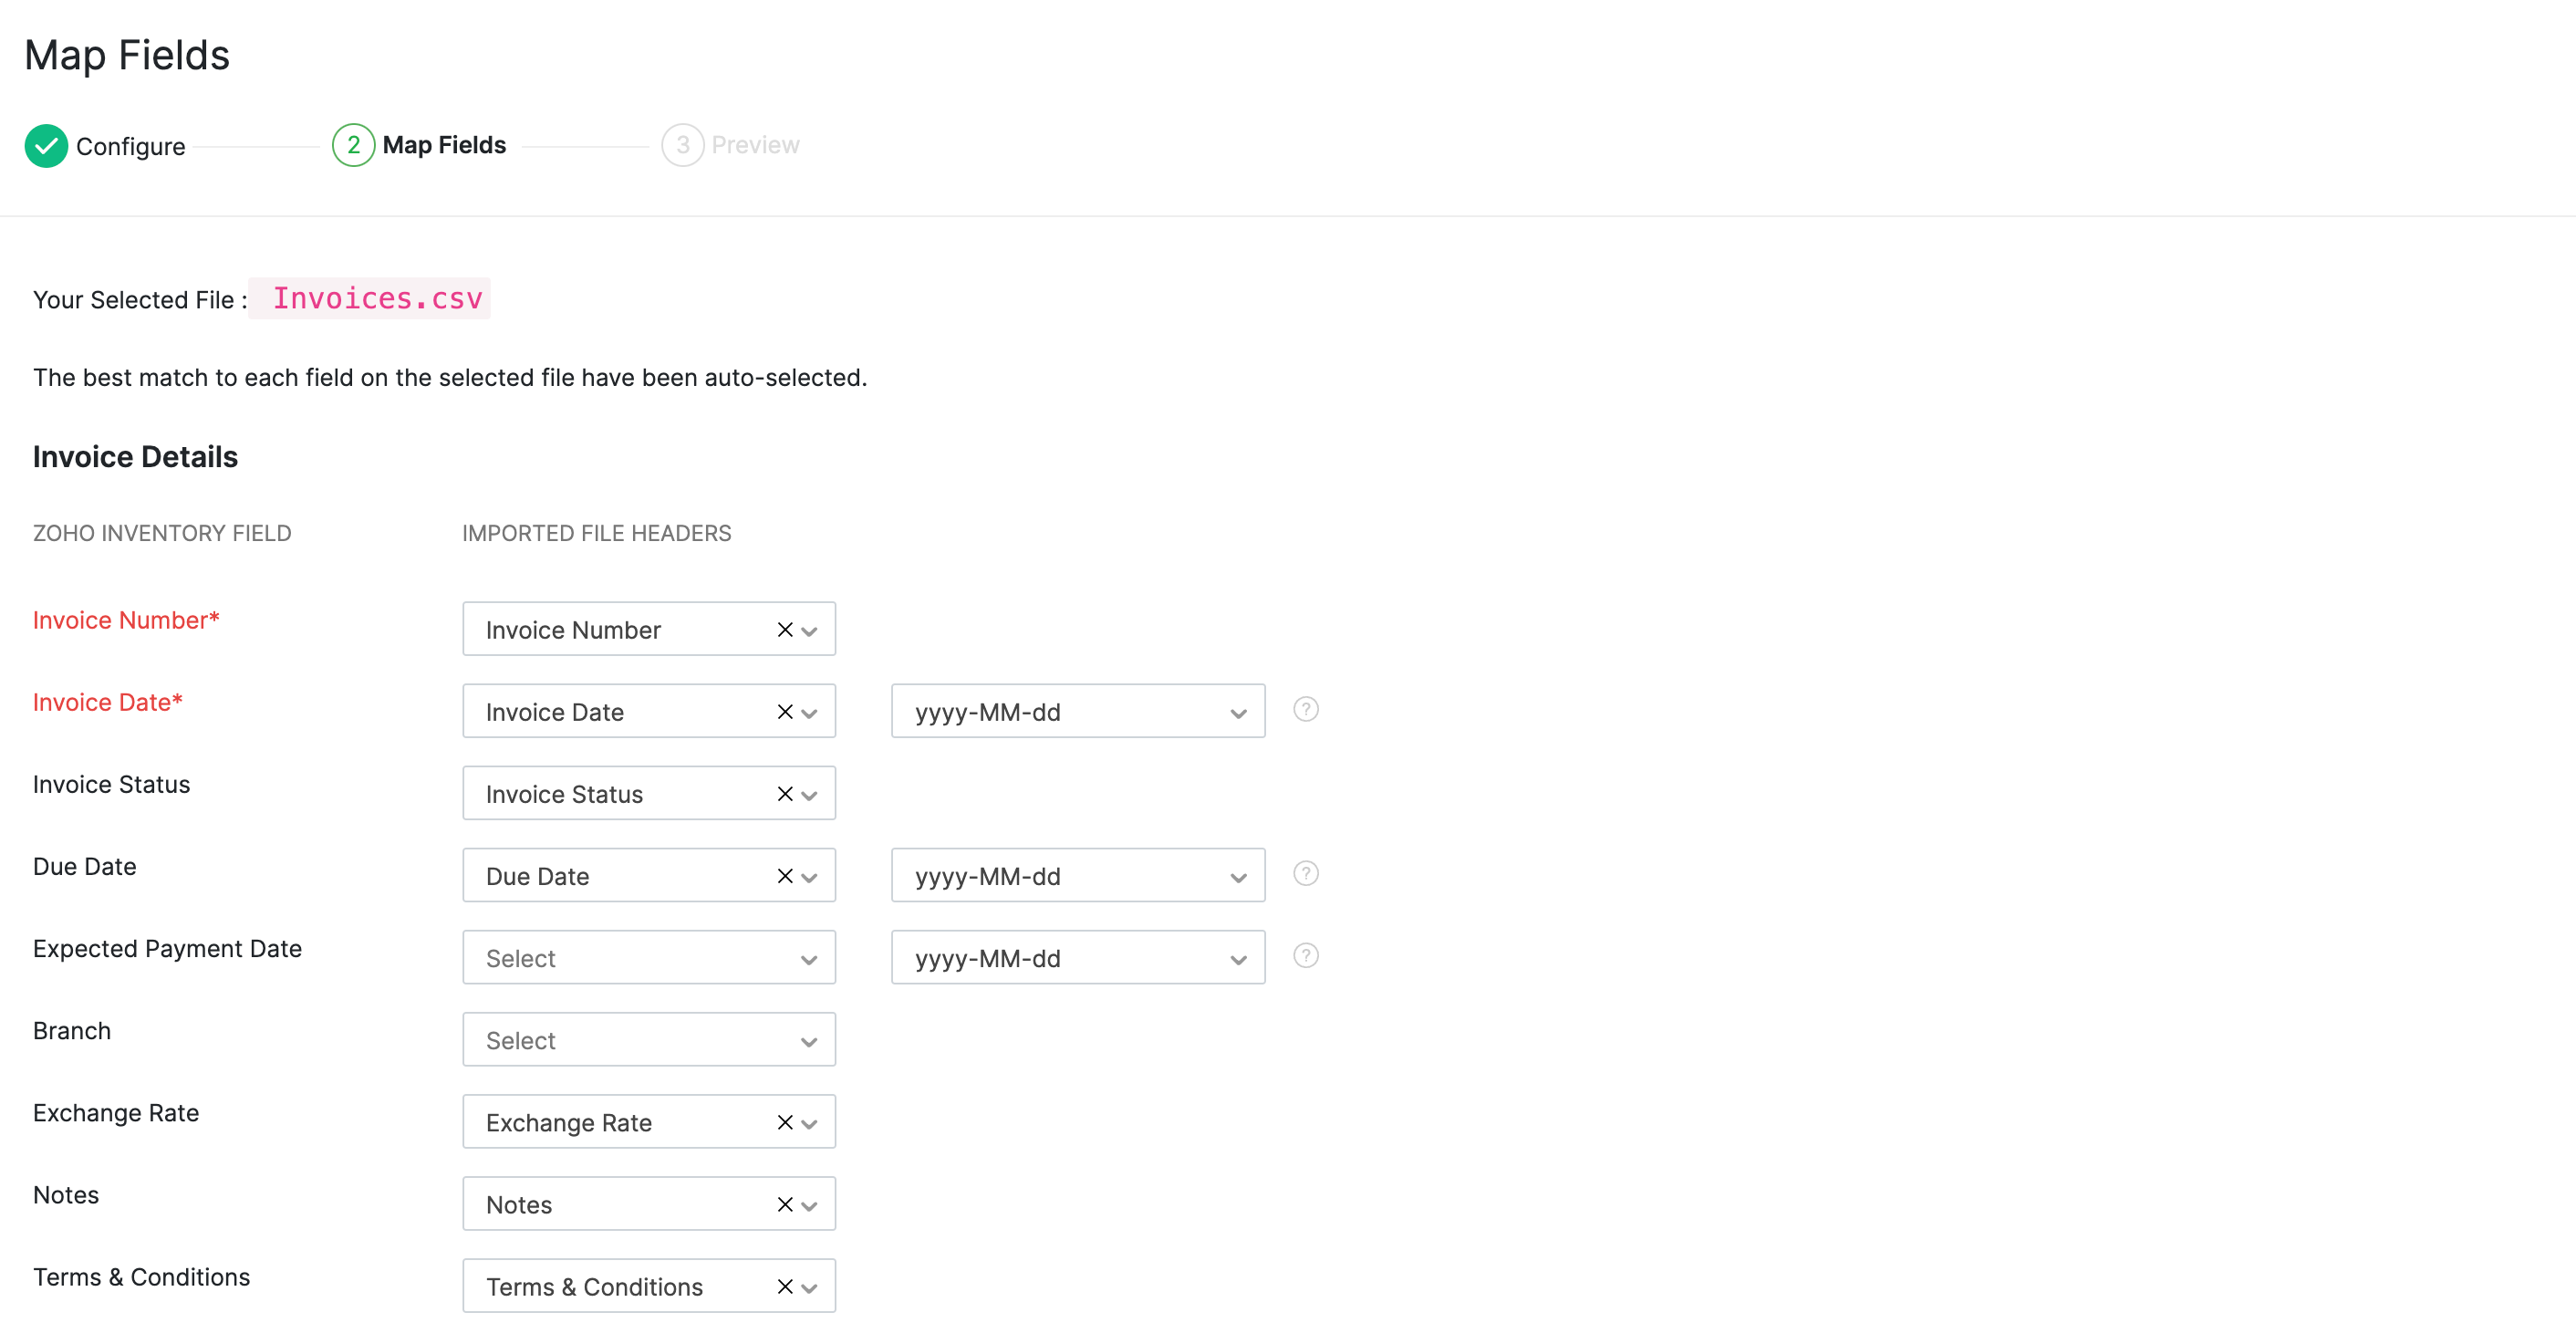
Click Next to proceed to mapping the fields.
Zoho Inventory finds similar fields and maps them automatically. You can make changes, if needed.
Check the box near the Save these selections for use during future imports option to automate mapping for future imports.
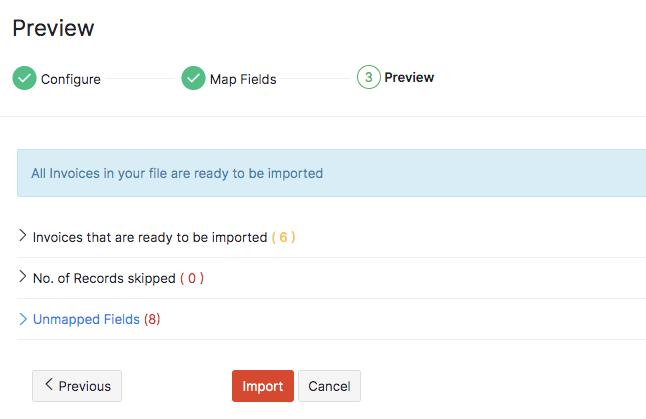
Click Next to proceed to the Preview window.
A summary of the number of invoices ready for import, number of skipped records and unmapped fields will be shown.
Click Previous to make changes. Otherwise, click Import.